Capturing Scotland’s heritage in 3D: How we created a 3D model of Mary Queen of Scots
Behind the Scenes, Digital, Skills | Written by: Yueqian Wang | Monday 15 July 2024
What is photogrammetry and how is it helping to record and protect Scotland’s heritage? Join Yueqian Wang, our Digital Innovation Trainee, to explore photogrammetry techniques through three objects: an Iron Age stone lamp, a small flat iron, and an effigy of Mary Queen of Scots!
I recently shared how we document historic buildings and sites in three dimensions (3D). As part of the Historic Environment Scotland (HES) Digital Documentation and Innovation team (DD&I), I also work alongside the Collections Team to digitise Scotland’s heritage. Our collections objects are all different from each other and I have gained many skills in photogrammetry and 3D modelling along the way.
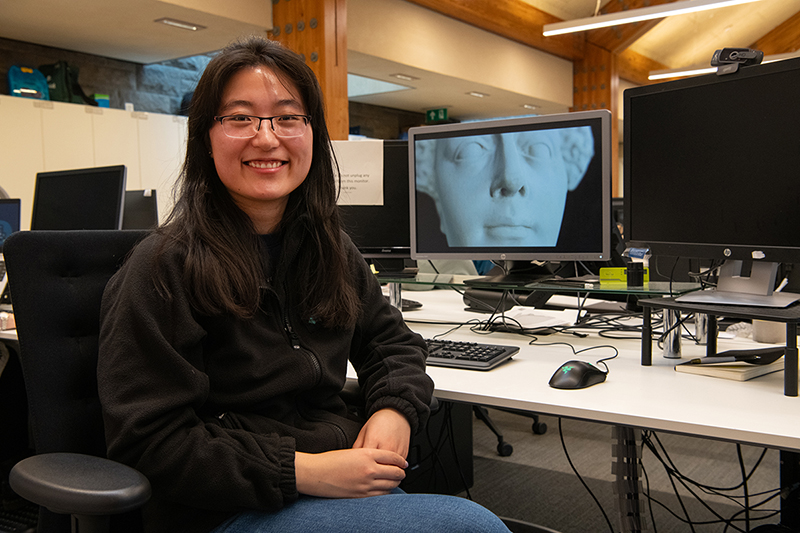
Trainee Yueqian Wang at the Engine Shed.
On the anniversary of her death, we released a 3D model of Mary Queen of Scot’s tomb effigy. I talk briefly about the processes for creating the model in our 3D scanning of Mary Queen of Scot’s face video.
Update your personalised ad preferences to view content
What is photogrammetry?
Photogrammetry is a way to create photorealistic 3D models based on images of objects. The photogrammetry software takes in information like the shape and colours from hundreds of photos, and generates a detailed 3D model. Photogrammetry can record cultural heritage objects in great depth, capturing vivid colours, decorative details, and even the tiny marks and scratches on the surface.
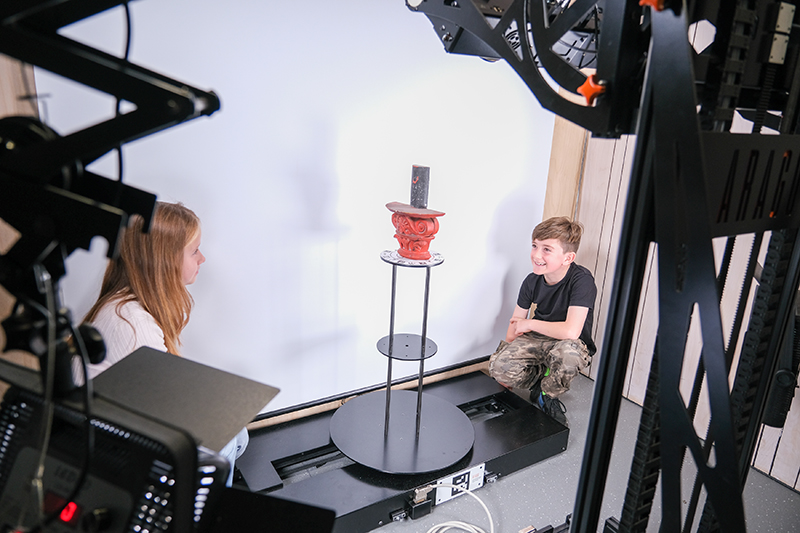
We use our Digital Imaging Lab at the Engine Shed for documenting smaller objects. Some young visitors are examining an object we use for training purposes during one of our open days.
Why do we use photogrammetry?
For the collections we curate, photogrammetry is an efficient way to build a detailed record of the current condition of an object. We use photogrammetry models to:
- provide digital alternatives to handling physical objects
- build virtual archives for conservation professionals and curators
- connect people with objects they might not be able to visit easily in person
- generate interpretative content to promote our heritage
Documenting collection objects has been a valuable experience in my traineeship. No two projects are the same and they are always interesting to document. To see my work being shared to support our heritage is the most rewarding moment of photogrammetry.
How we capture and process images
Compared to photogrammetry surveys of landscapes and sites, we have more control over the working environment when documenting objects. At the Engine Shed, our Digital Imaging Lab is set up for documenting objects.
We process all photos to make sure the colours are accurate and consistent and check the exposure to keep details clearly visible. This is a crucial step in the process as these photos are the baseline source of the reconstructed model.
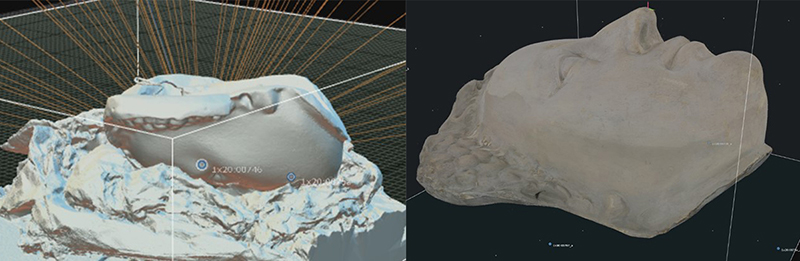
Next, we import the edited photos into the photogrammetry software where all the images are aligned in the 3D space.
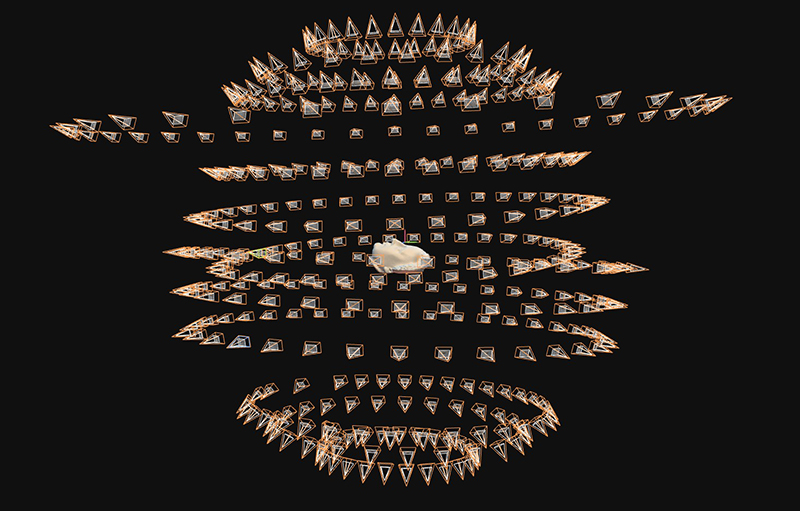
This is a screenshot showing the 3D model of an effigy of Mary Queen of Scots. In the processing software, the camera positions are represented by the orange cones. Two sets of photos were taken of the front and back of the object, forming two domes of camera positions.
Working in the 3D space
At this stage, the software creates an initial alignment of the source photos, piecing them together to generate a point cloud of the object.
Once the scale is set and the alignment looks correct, we use the software to generate a mesh model which shows the geometry and surface detail in-depth.
The last step is to add the colour to the mesh to create a textured, to-scale 3D model.
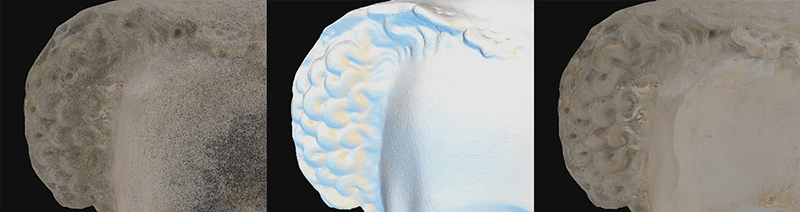
Left: Point cloud. Centre: Mesh model before texture. Right: Textured model of the details on the tomb effigy.
Getting creative with an Iron Age lamp
My journey in photogrammetry started with our collections objects from Orkney, including an Iron Age stone lamp. Working on this project was rewarding as my model was published online as a part of our 3D collections at the Broch of Gurness.
Photogrammetry models are an ideal tool for interpretation. We can recreate how objects might have been used without risking culturally significant artefacts. For example, you can virtually test how liquids behave with an object or put it under different weathers or times of a day.
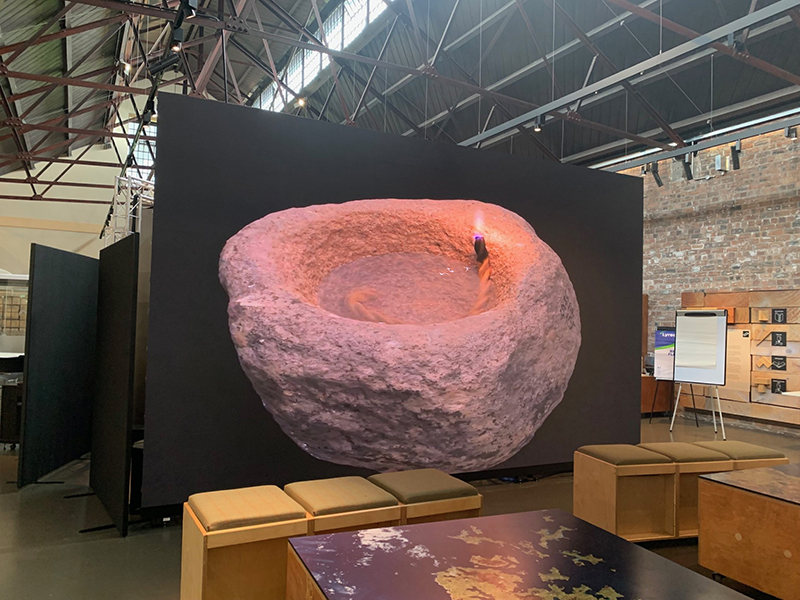
You can add atmospheric lighting to the composition as shown here on display on the large LED screen at the Engine Shed.
3D models can be used for artistic interpretation too. For this project, I added multiple light sources to illuminate the lamp. The warmer tone highlights the texture while the cooler tone traces the outline, giving a sense of its ancient history. 3D technology gives us the limitless potential to be creative with promoting our heritage!
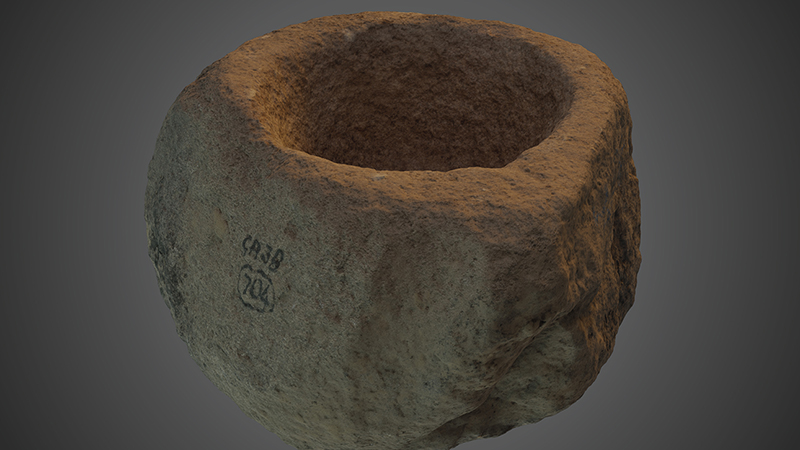
An artistic render of the digital model of the lamp.
How to capture shiny objects
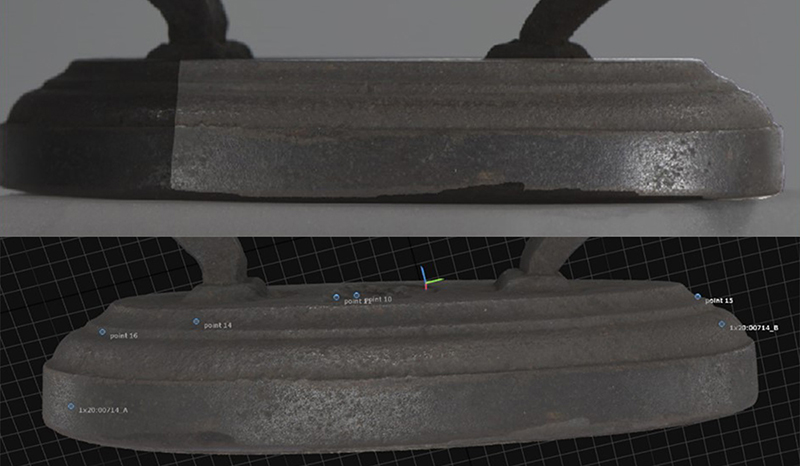
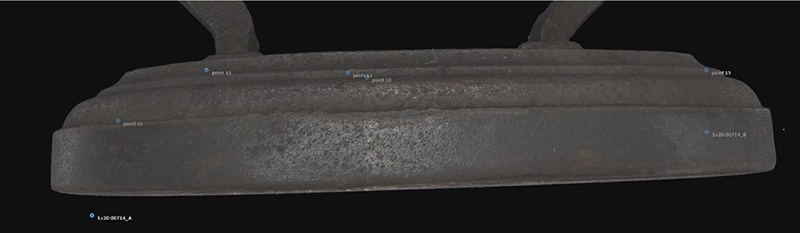
Not all objects can be accurately captured with the standard photogrammetry process. Sometimes each project poses a unique challenge, like this shiny small flat iron from Arbroath Abbey.
Capturing the reflective surface
The first challenge was capturing its reflective surface. When the camera moved, the highlight or shine also changed in each photo, which lead to misalignments and ‘noise’ (extra bumpiness on the mesh model).
More control points were added to correct the alignment. It is important to spread the control points, so the software is guided to see the object holistically.
The ‘noise’ was not a feature of the original object and needed to be smoothed in 3D modelling software (Blender).
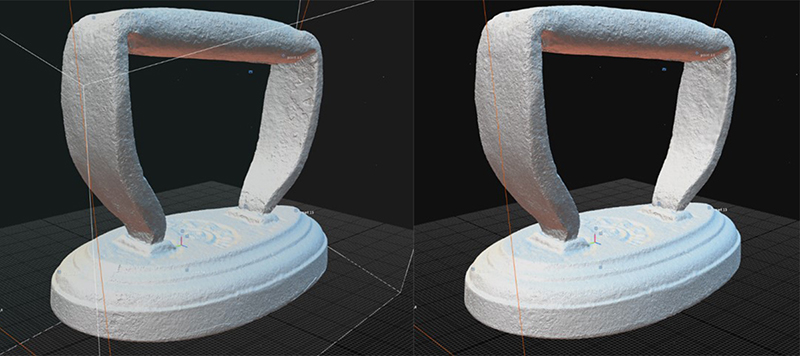
Left: Before reducing noise. Right: After reducing noise.
Out-of-focus images
The second challenge was working with out-of-focus images. To capture details of this tiny object, we needed to increase the focal length. This meant that the iron looked larger through the camera, but only a smaller part of it was in-focus. The solution was to only use photos with sharp definitions and mask out the blurred areas, also known as masking.
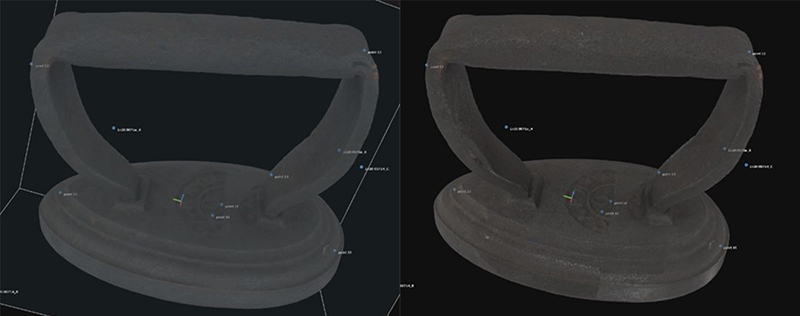
Left: Using many photos, the texture is blurry. Right: The texture is better when using fewer photos in-focus.
Above and below: Irregular marks can be seen on the textures.
After refining the masks in the source images, the joining images follow the natural edge and are less visually intrusive.
Improved masks help the software to blend photos.
Correcting blank areas
The last challenge was losing data on hidden areas. In this case, the inner corners of the handle were in shadows or out-of-focus during the capture, leaving blank spaces on the textured model.
Blank areas should be corrected with 3D modelling software. However, it is important to only make changes when we can confirm the details from photographs.

Top: before texture correction. Bottom: after texture correction.
Creating a 3D model of Mary Queen of Scots
I had the opportunity to put my skills into practice and document the tomb effigy of Mary Queen of Scots, from Linlithgow Palace. This object is made of plaster with a metal hook on the back, and it has a smooth, reflective surface.
We used a polarised filter on the camera to mute the reflections of the mask, learning from previous projects working with reflective objects. This method greatly improved the quality of the initial alignment.
Left: Texturing the model was also challenging as the mask was placed upside down during capture. Right: The shadows in the photos made the margin of the mask look darker in the textured model.
To fix the textures, I discarded most of the photos in shadow, so that the dominant source was photos with even lighting. This project used 231 photos of the front of the mask and less than 40 photos of the back.
To make the colour look more even, in some of the photos I lightened the shadow around the chin by increasing the exposure. After the postprocessing, the texture looked even, and the documentation of the model was finished.
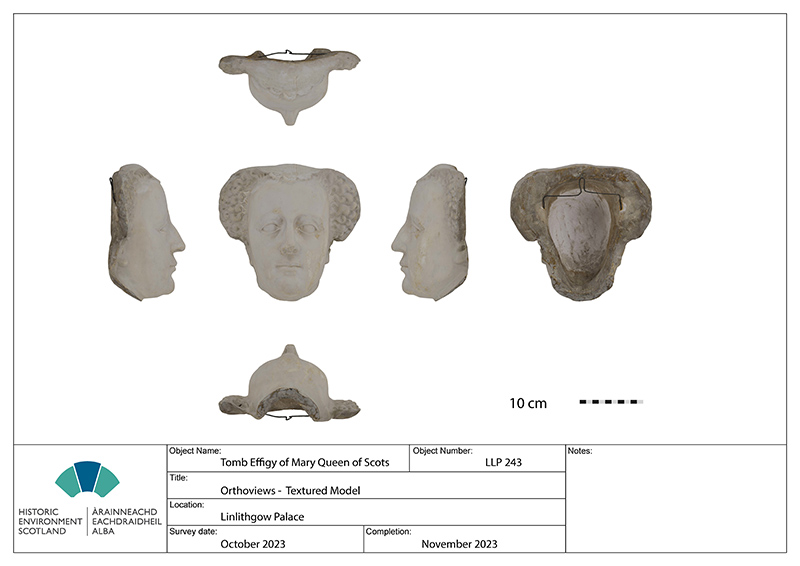
Orthographic images generated from the to-scale textured model. This is a part of digital documentation and can be used as archives or working templates by conservation professionals.
The textured model was not ready for interpretation purposes yet as two things were missing from the photos: the metallic reflection of the hook and the surface finishing of the plaster mask. 3D modelling software needs instructions given through maps to do this, as those features should only appear on certain parts of the model.
A map is a 2D image linked to visible features on a 3D model. Each section of a map is a flattened model surface. Information like colour, reflectiveness, and bumpiness can be stored in maps. Like a normal image, maps are editable, and all the editing is reflected on the model.
Left: Diffuse map, showing the colour. Right: Metallic map. The white strokes mark the metal used on the model.
I used a virtual brush to paint the surface of the 3D model where it should be metallic or shiny to create the maps. These visualised the different materials used on this unique collection object and completed the visual storytelling.
Find out more
Yueqian is our Digital Innovation Trainee, part of our Trainee and Craft Fellowship Programme. We advertise all Craft Fellowship, Trainee and Apprenticeship vacancies on the Historic Environment Scotland website when available.
Interested in digital documentation or topics related to built heritage and conservation Find out more about our Digital Documentation and Innovation team. Explore our 3D models of historic places and objects on Sketchfab.
About the author:
Yueqian Wang
Yueqian Wang was a Digital Innovation Trainee at the Engine Shed, working jointly with Historic Environment Scotland's Digital Documentation and Innovation team and the National Trust for Scotland. She graduated in Architectural Conservation from the University of Edinburgh. Her traineeship explored the ways digital documentation can be innovatively applied to the heritage sector as a tool for site management, accessibility, monitoring, and more.
View all posts by Yueqian Wang
